
Quickstart: your first margin in an afternoon
This guide takes you from an empty workspace to your first real margin. You add one person, one client, one project, and one cost, then read the result on the dashboard. It takes about ten minutes.
You need an account to start. A fresh workspace shows a guided home screen until you add your first employee and client, then the dashboard takes over.
Most actions in this guide start from the + Add button in the top bar. You can also press Cmd+K (Ctrl+K on Windows) to open the command palette and search for the same actions.
1. Add your first employee
Section titled “1. Add your first employee”Click + Add, then Add employee. Fill in the first name, last name, employment type, and start date. The rest is optional for now. Click Create.
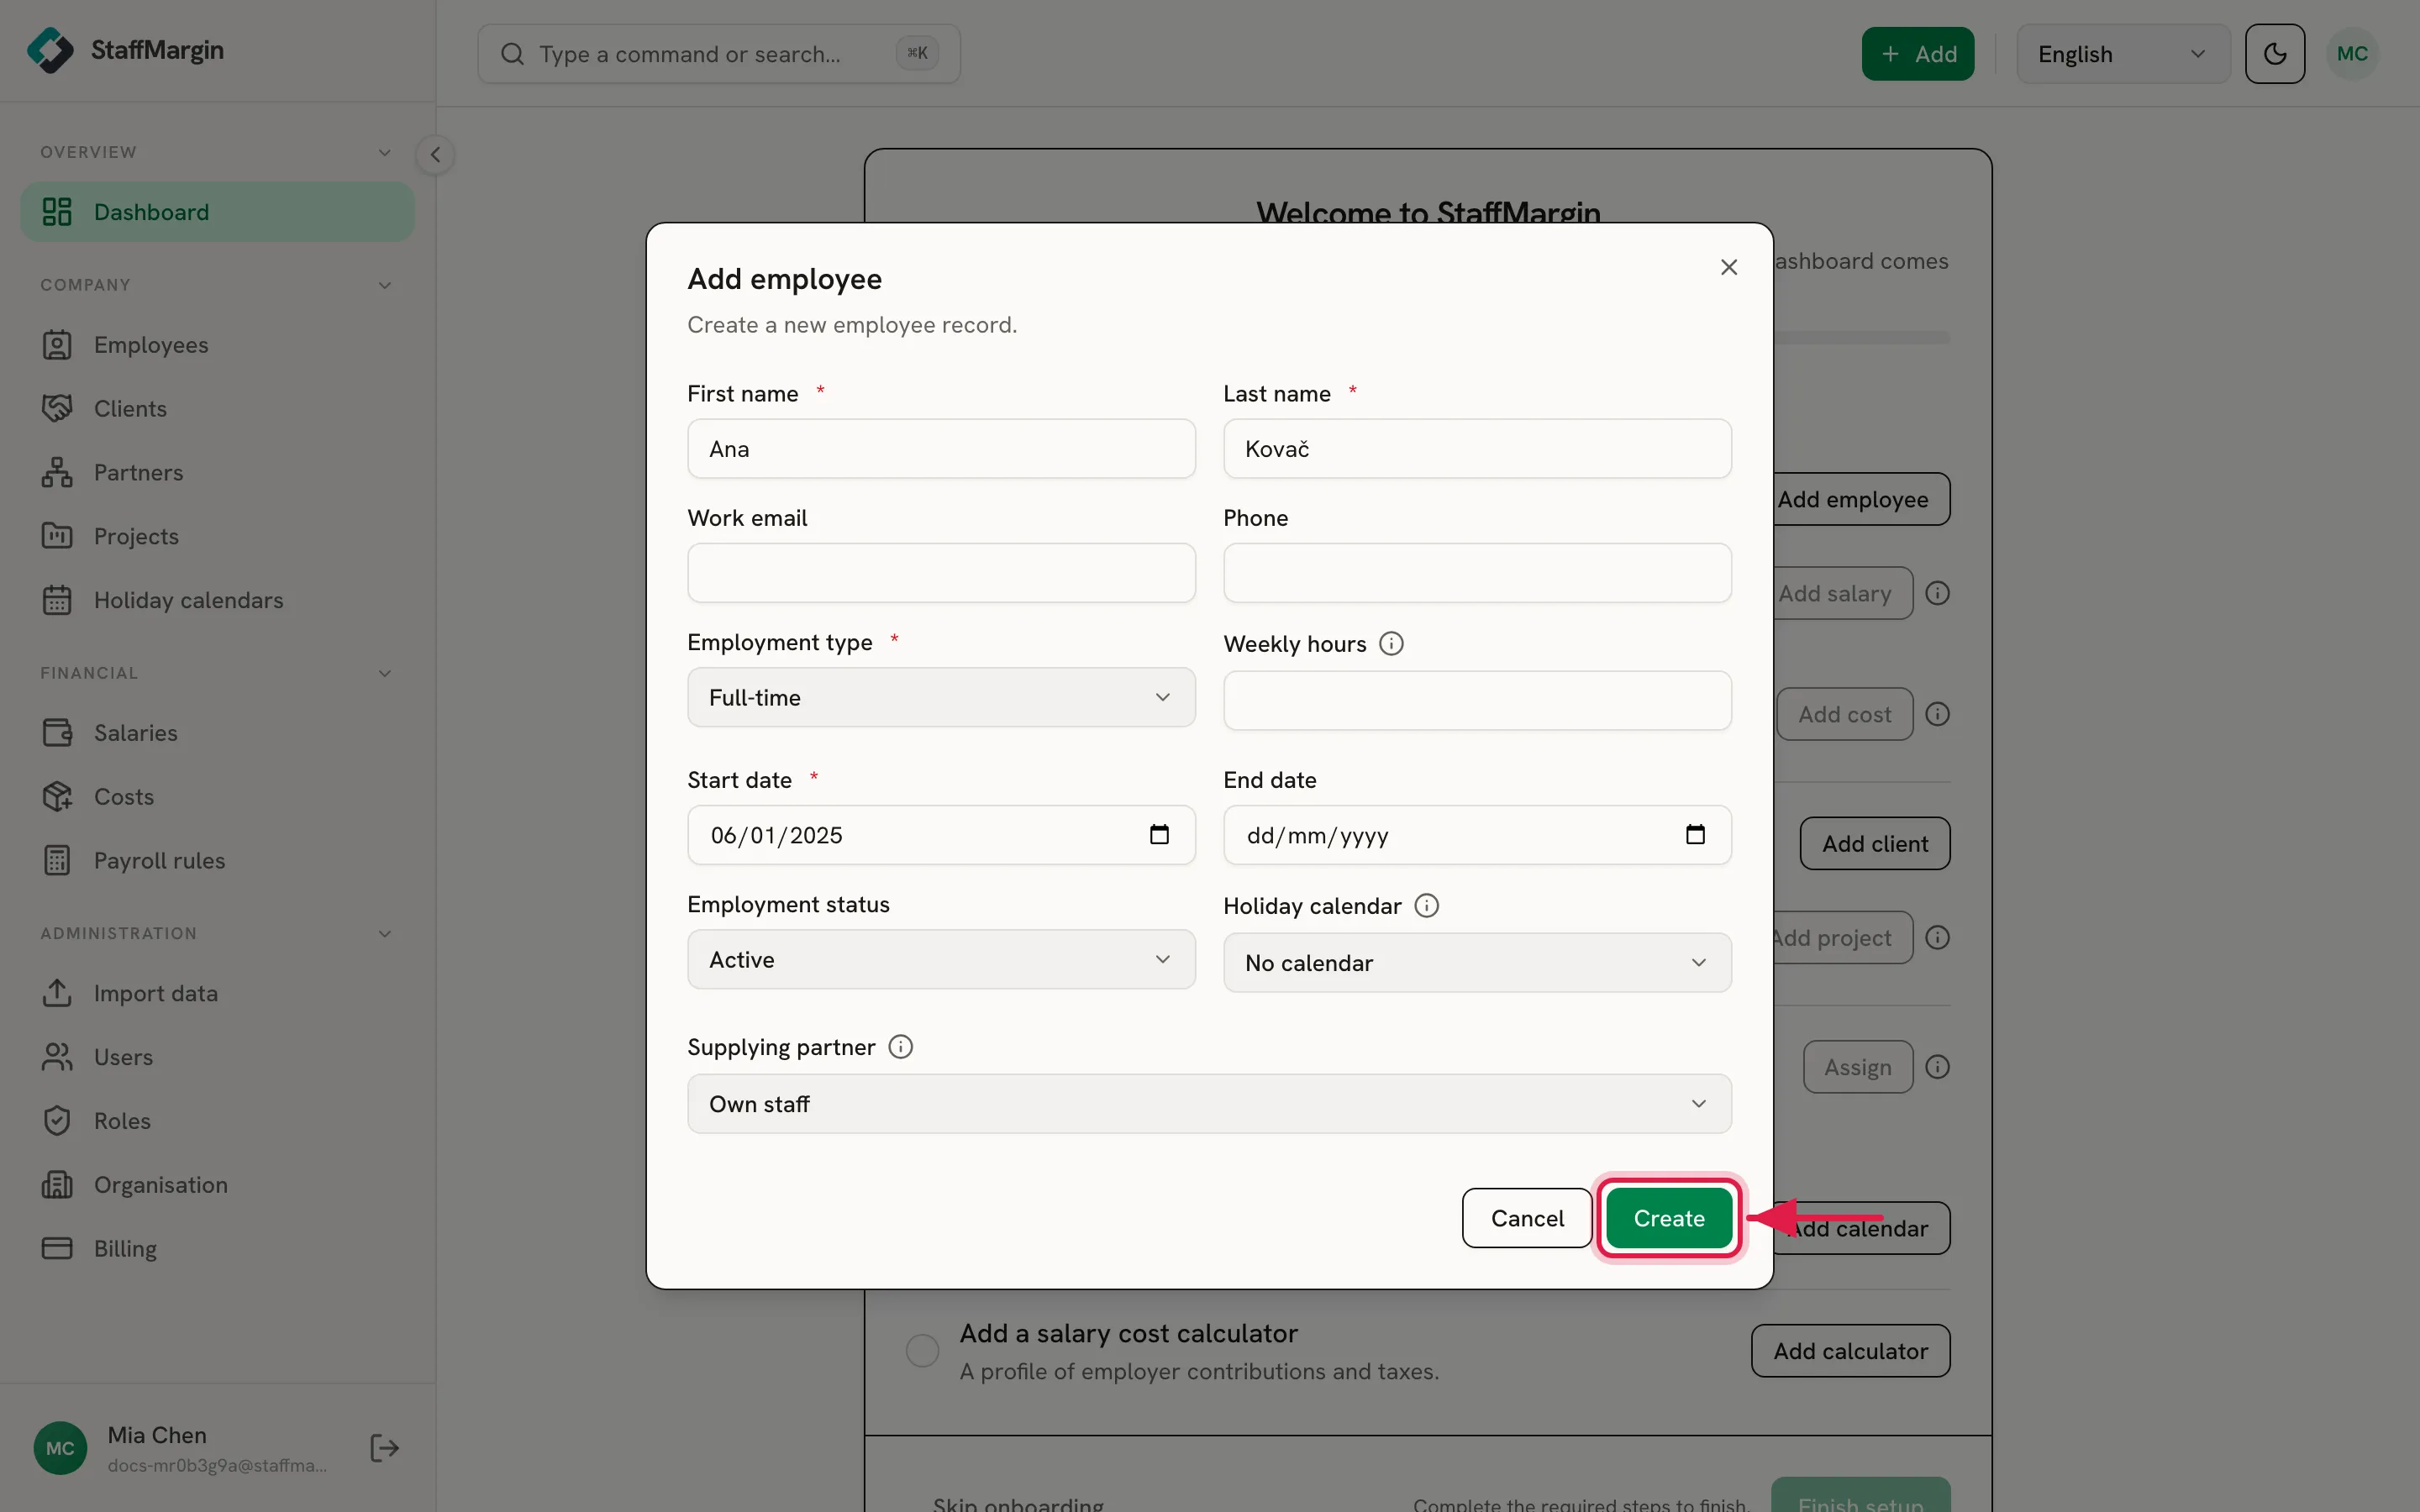
The form does not close. It slides straight to a salary step for the person you just created.
2. Add a salary
Section titled “2. Add a salary”On the Add salary step, enter the amount and pick the layer it represents (Net, Gross, or Employer cost). Set the currency and pay basis, and leave the effective date on the hire’s start date. Click Save.
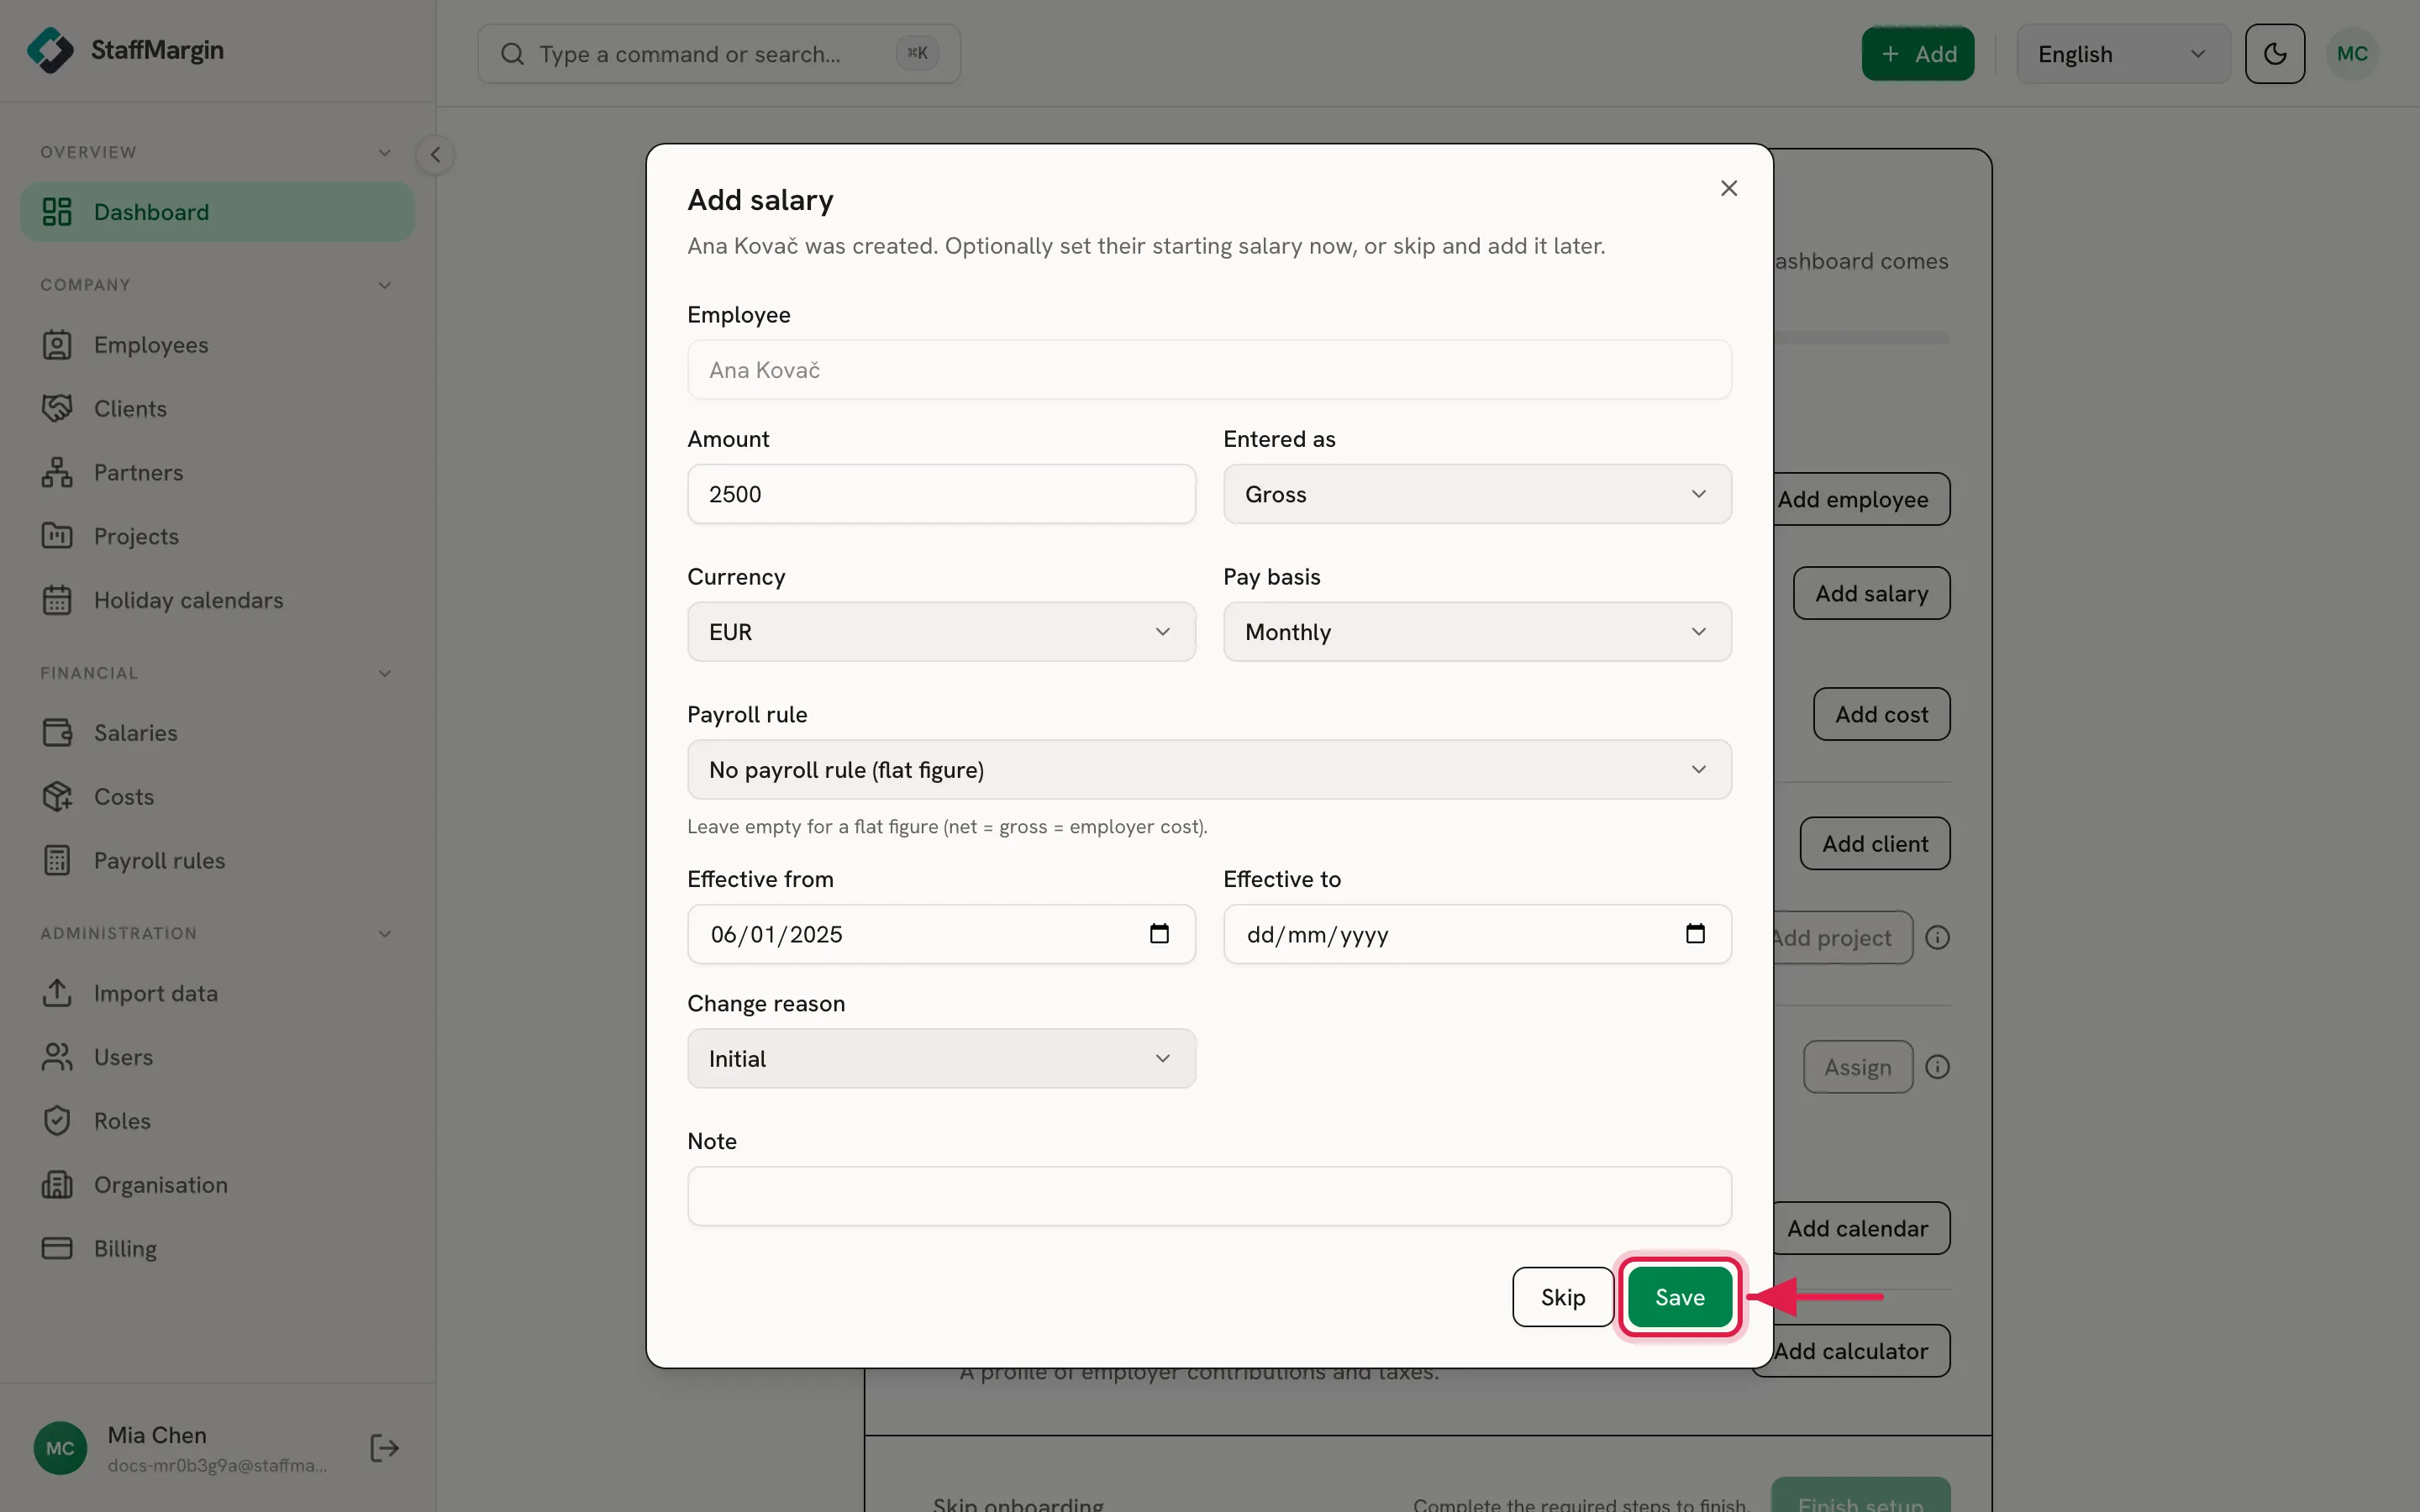
The salary is what StaffMargin turns into a fully loaded cost. To gross a net salary up to real employer cost, attach a Payroll rule here, which also sets the currency for you. See employer cost and the salary engine for how that works. If you want to add the salary later, click Skip instead. Staff supplied by a partner are paid by the partner, so they have no salary step.
3. Create your first client
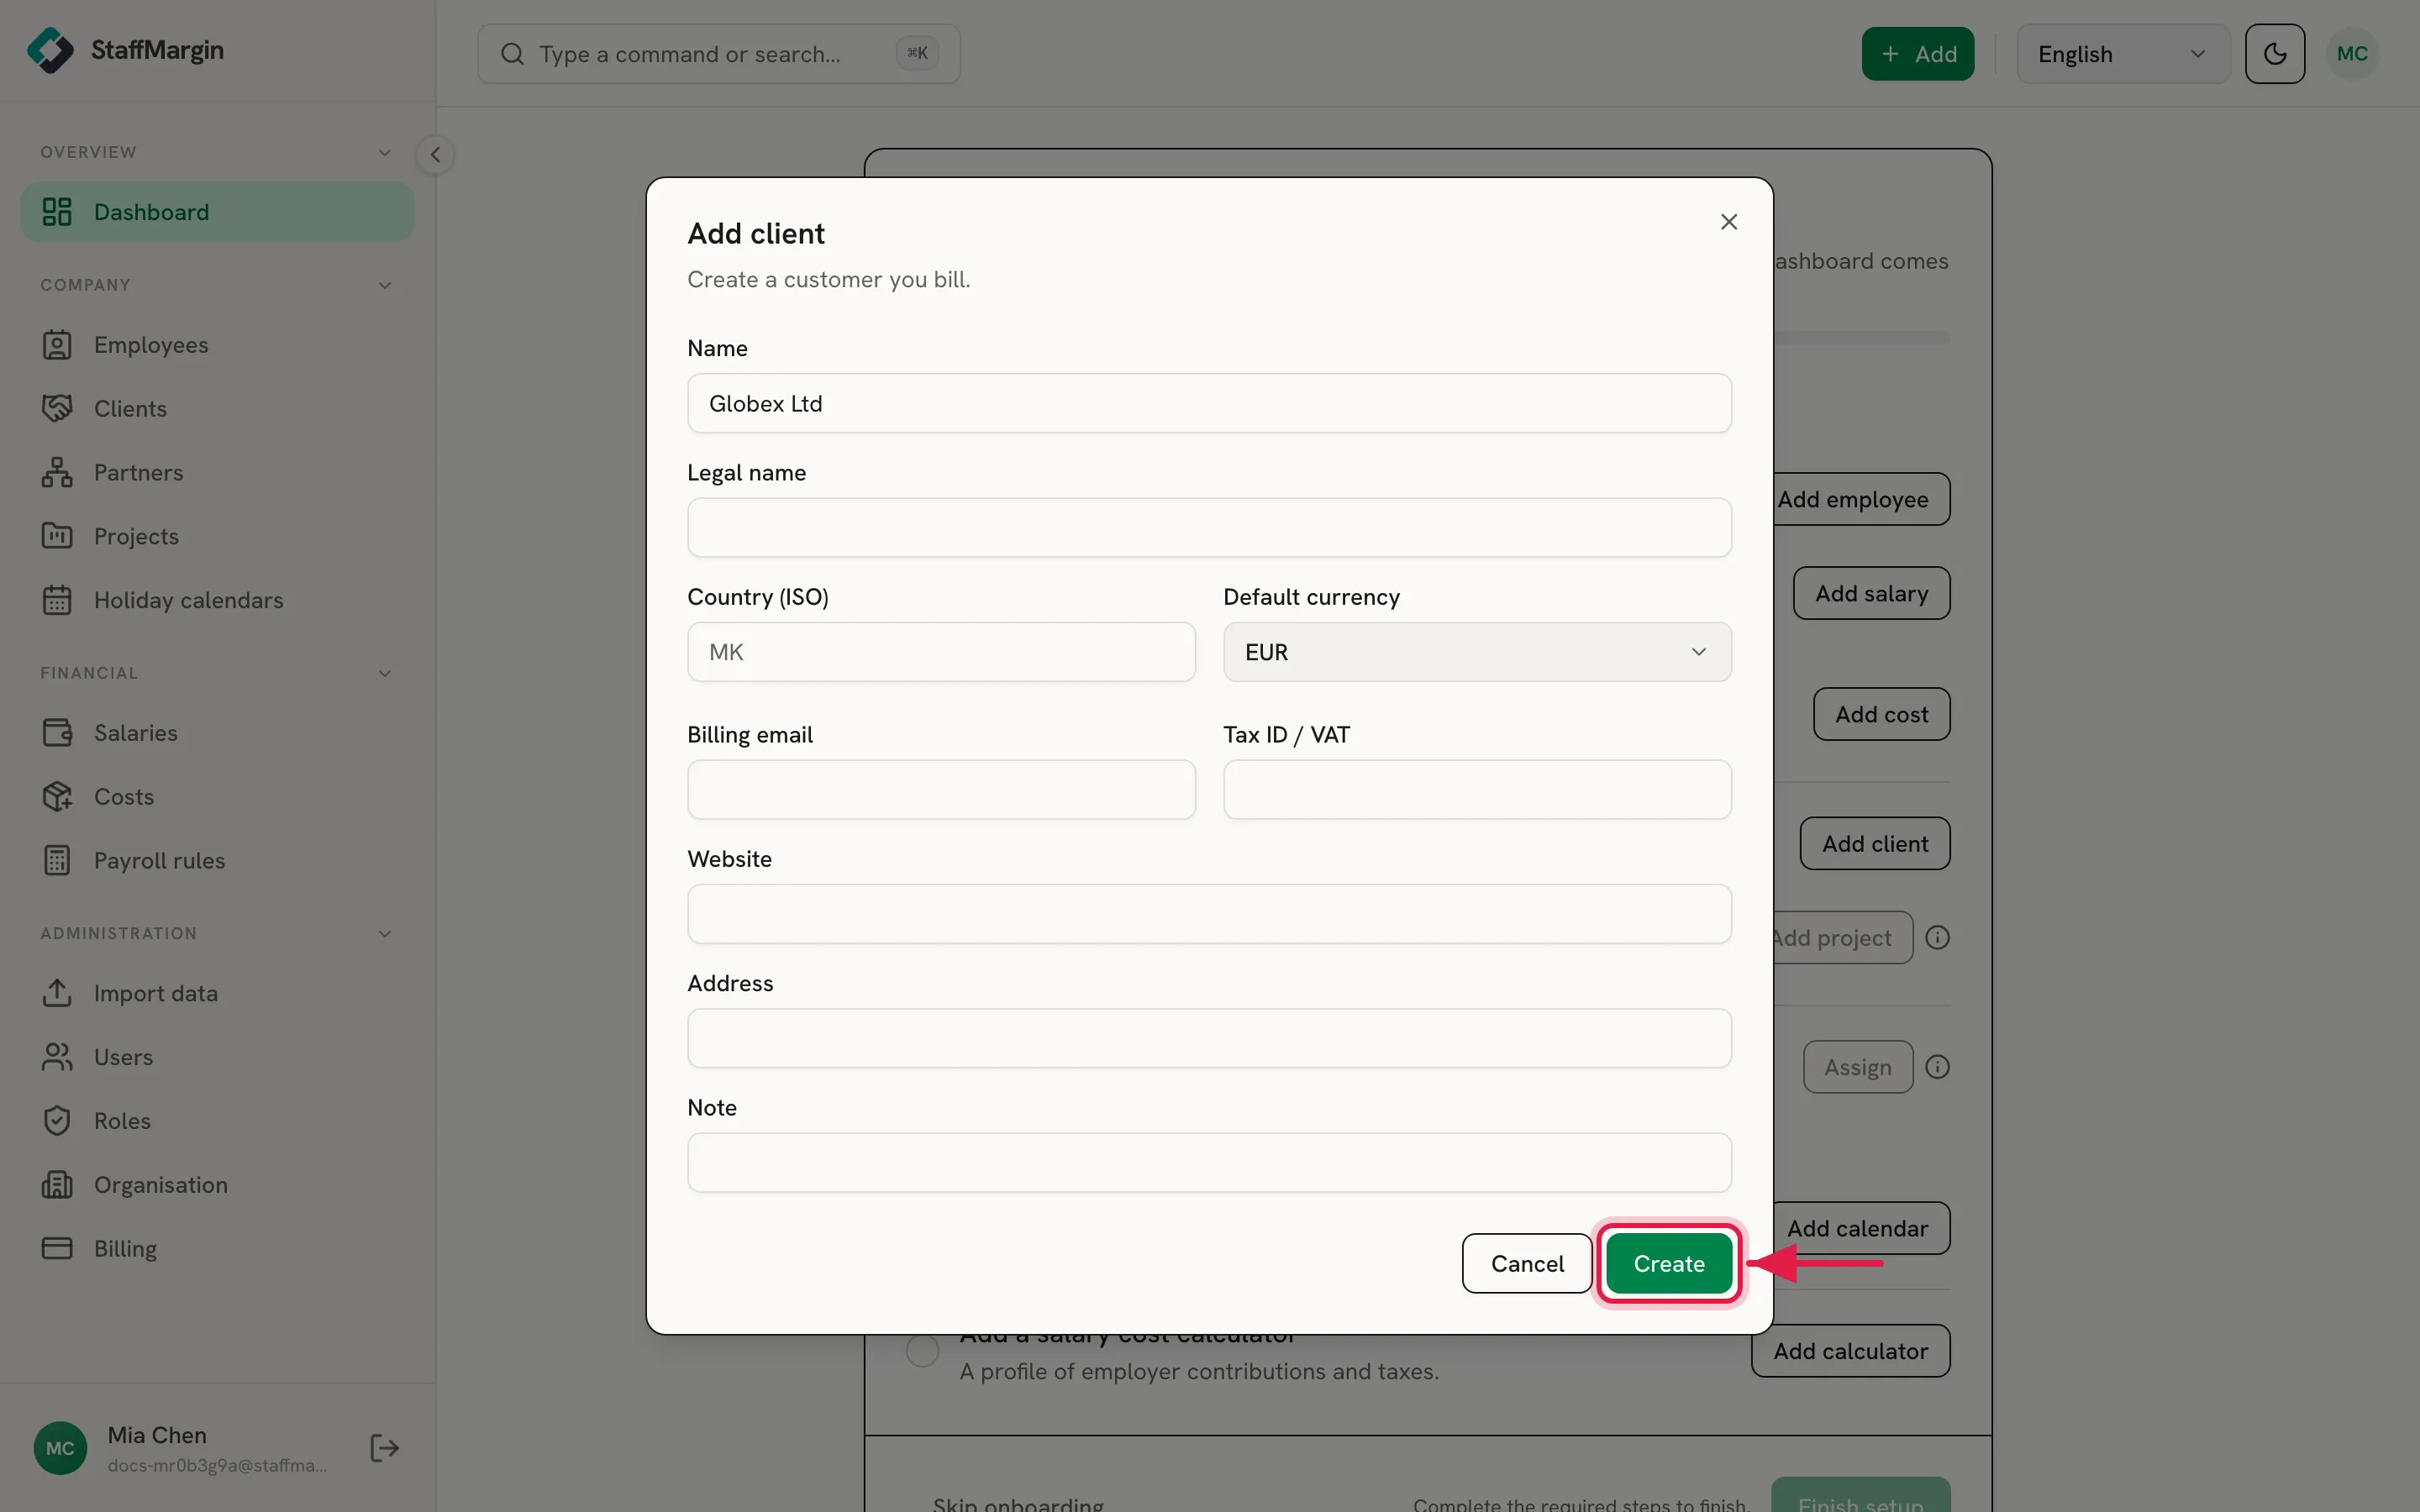
Section titled “3. Create your first client”Click + Add, then Add client. The name is the only required field. Add a country, default currency, and billing email if you have them. Click Create.
4. Create a project for the client
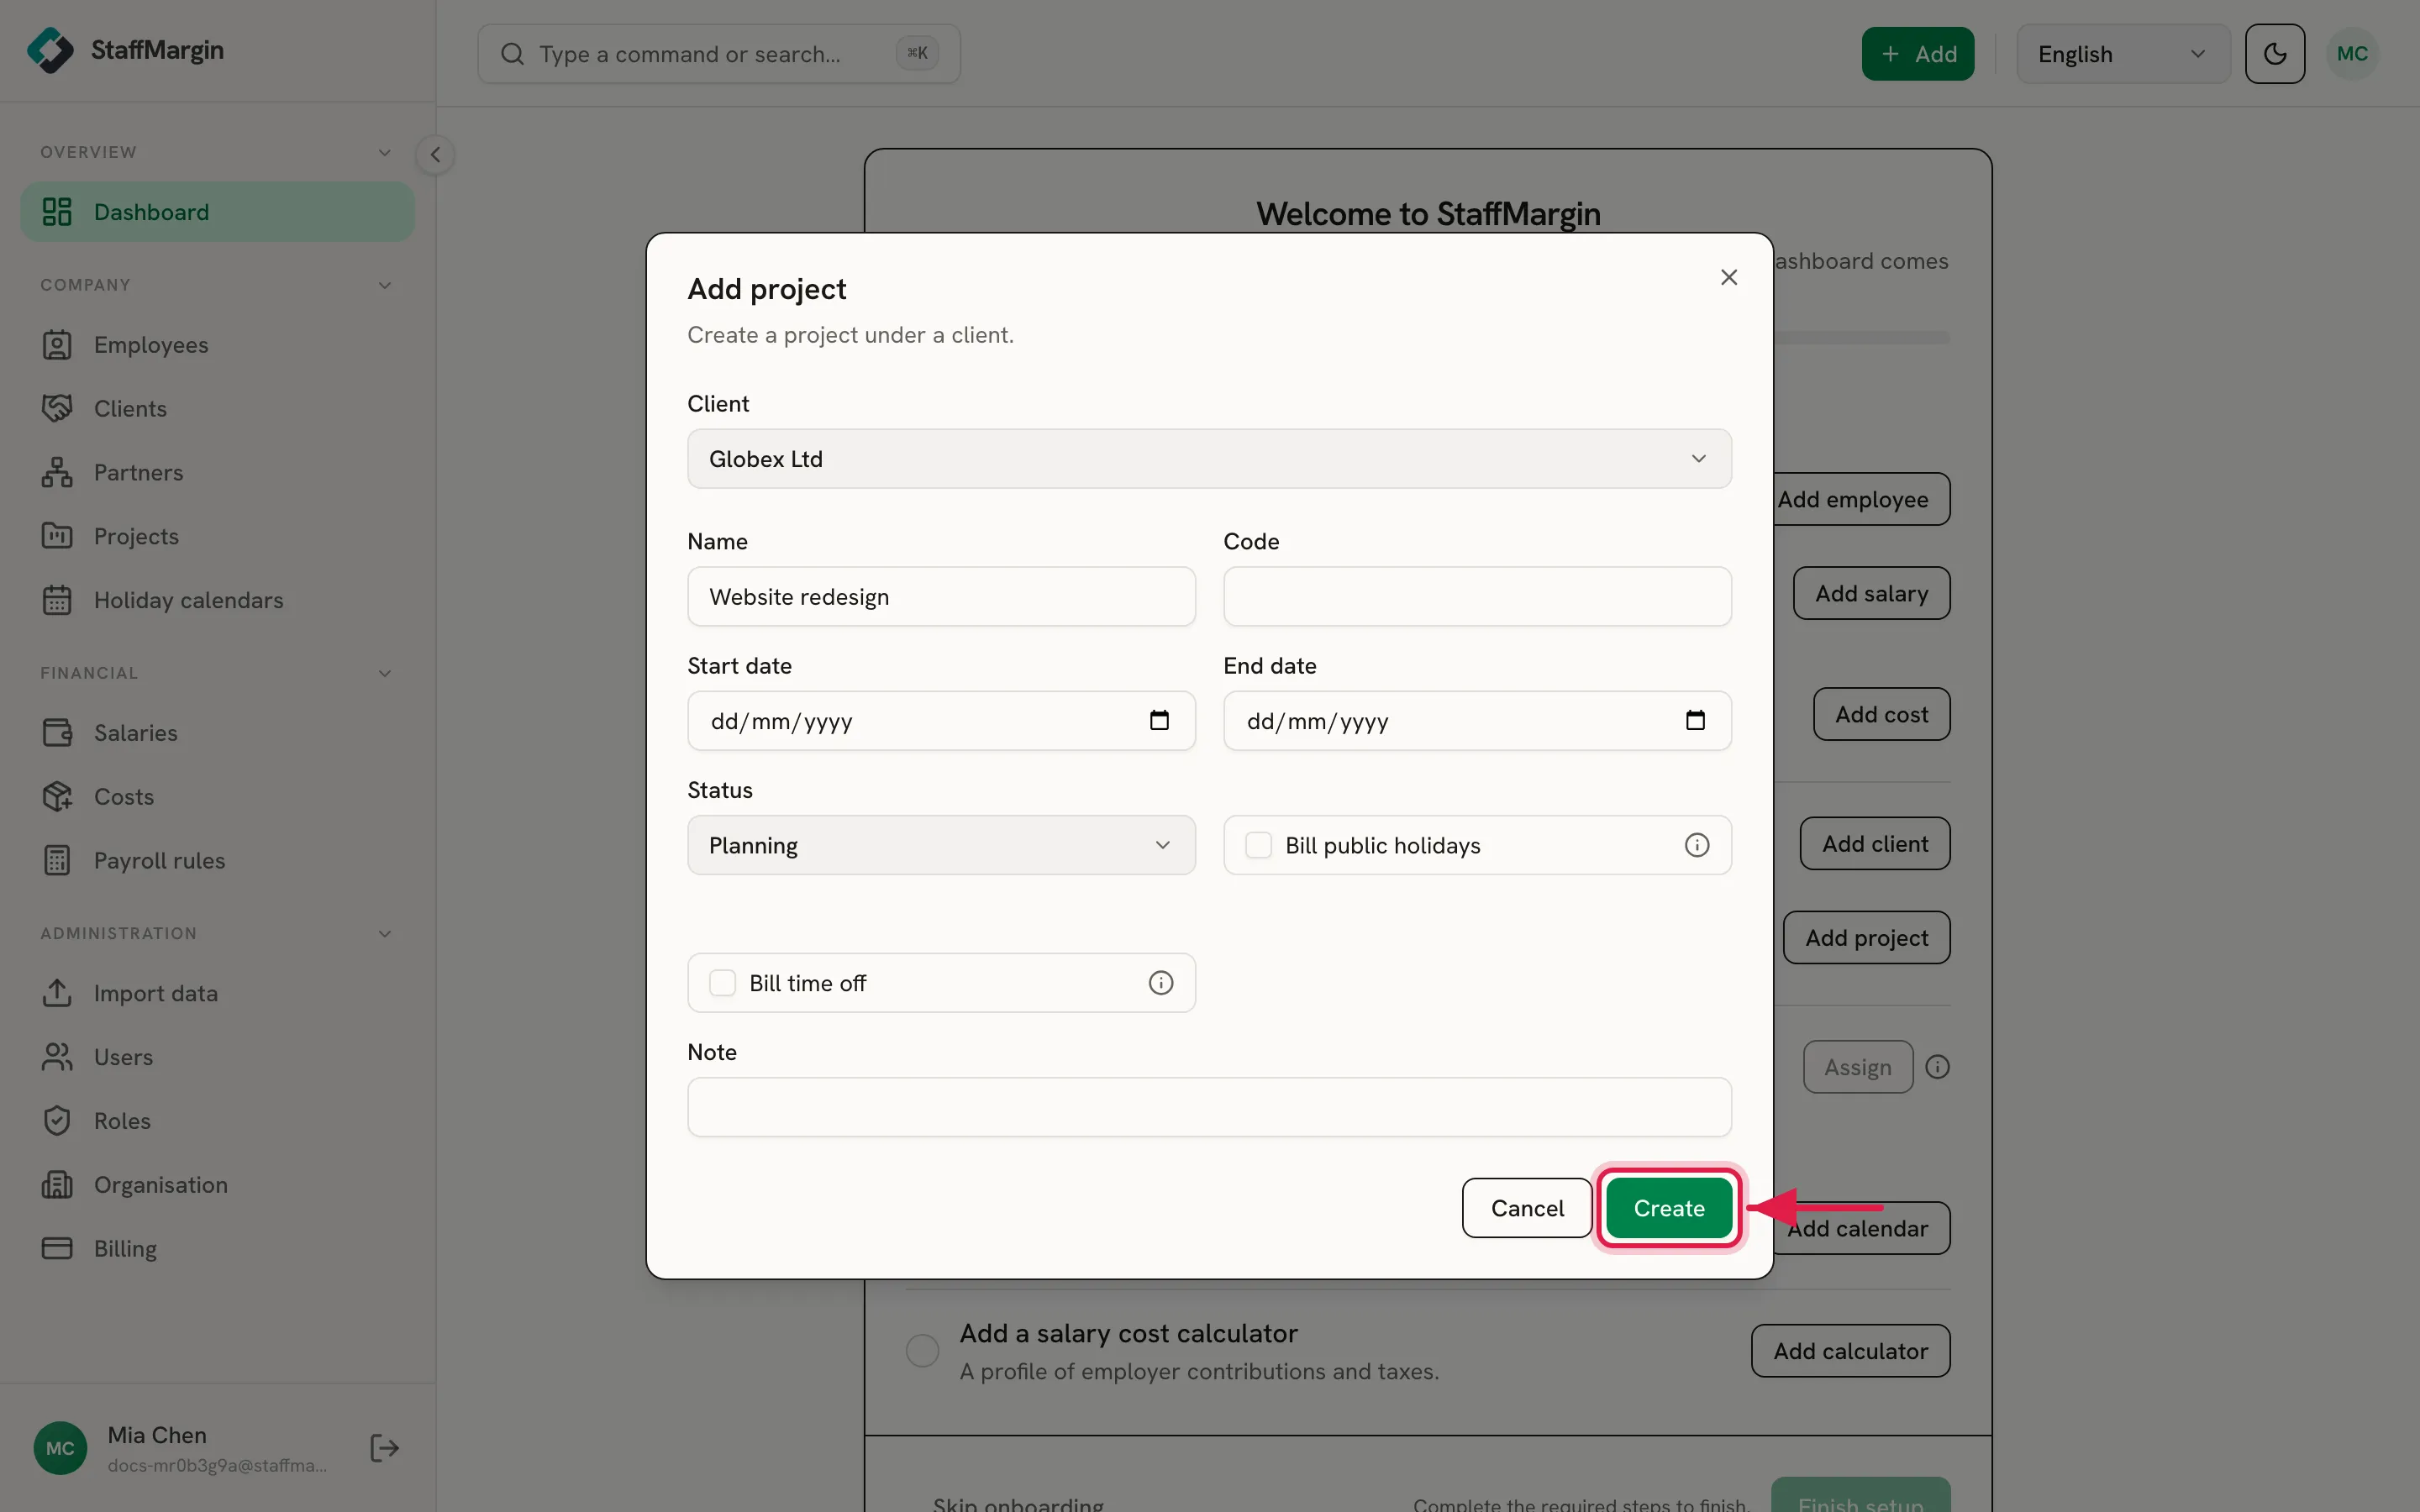
Section titled “4. Create a project for the client”Click + Add, then Add project. Pick the client you just created, give the project a name, and click Create. Code, dates, and status are optional. You can also start this from the client’s page, which fills in the client for you.
5. Add the employee to the project
Section titled “5. Add the employee to the project”Open Projects in the sidebar, find your project, and open its actions menu (More actions), then Manage people. Click Add person. Pick the employee, set a role if you want, then set the rate type, rate amount, and currency. Leave engagement at 100 percent for a full-time assignment. Set the effective date and click Add.
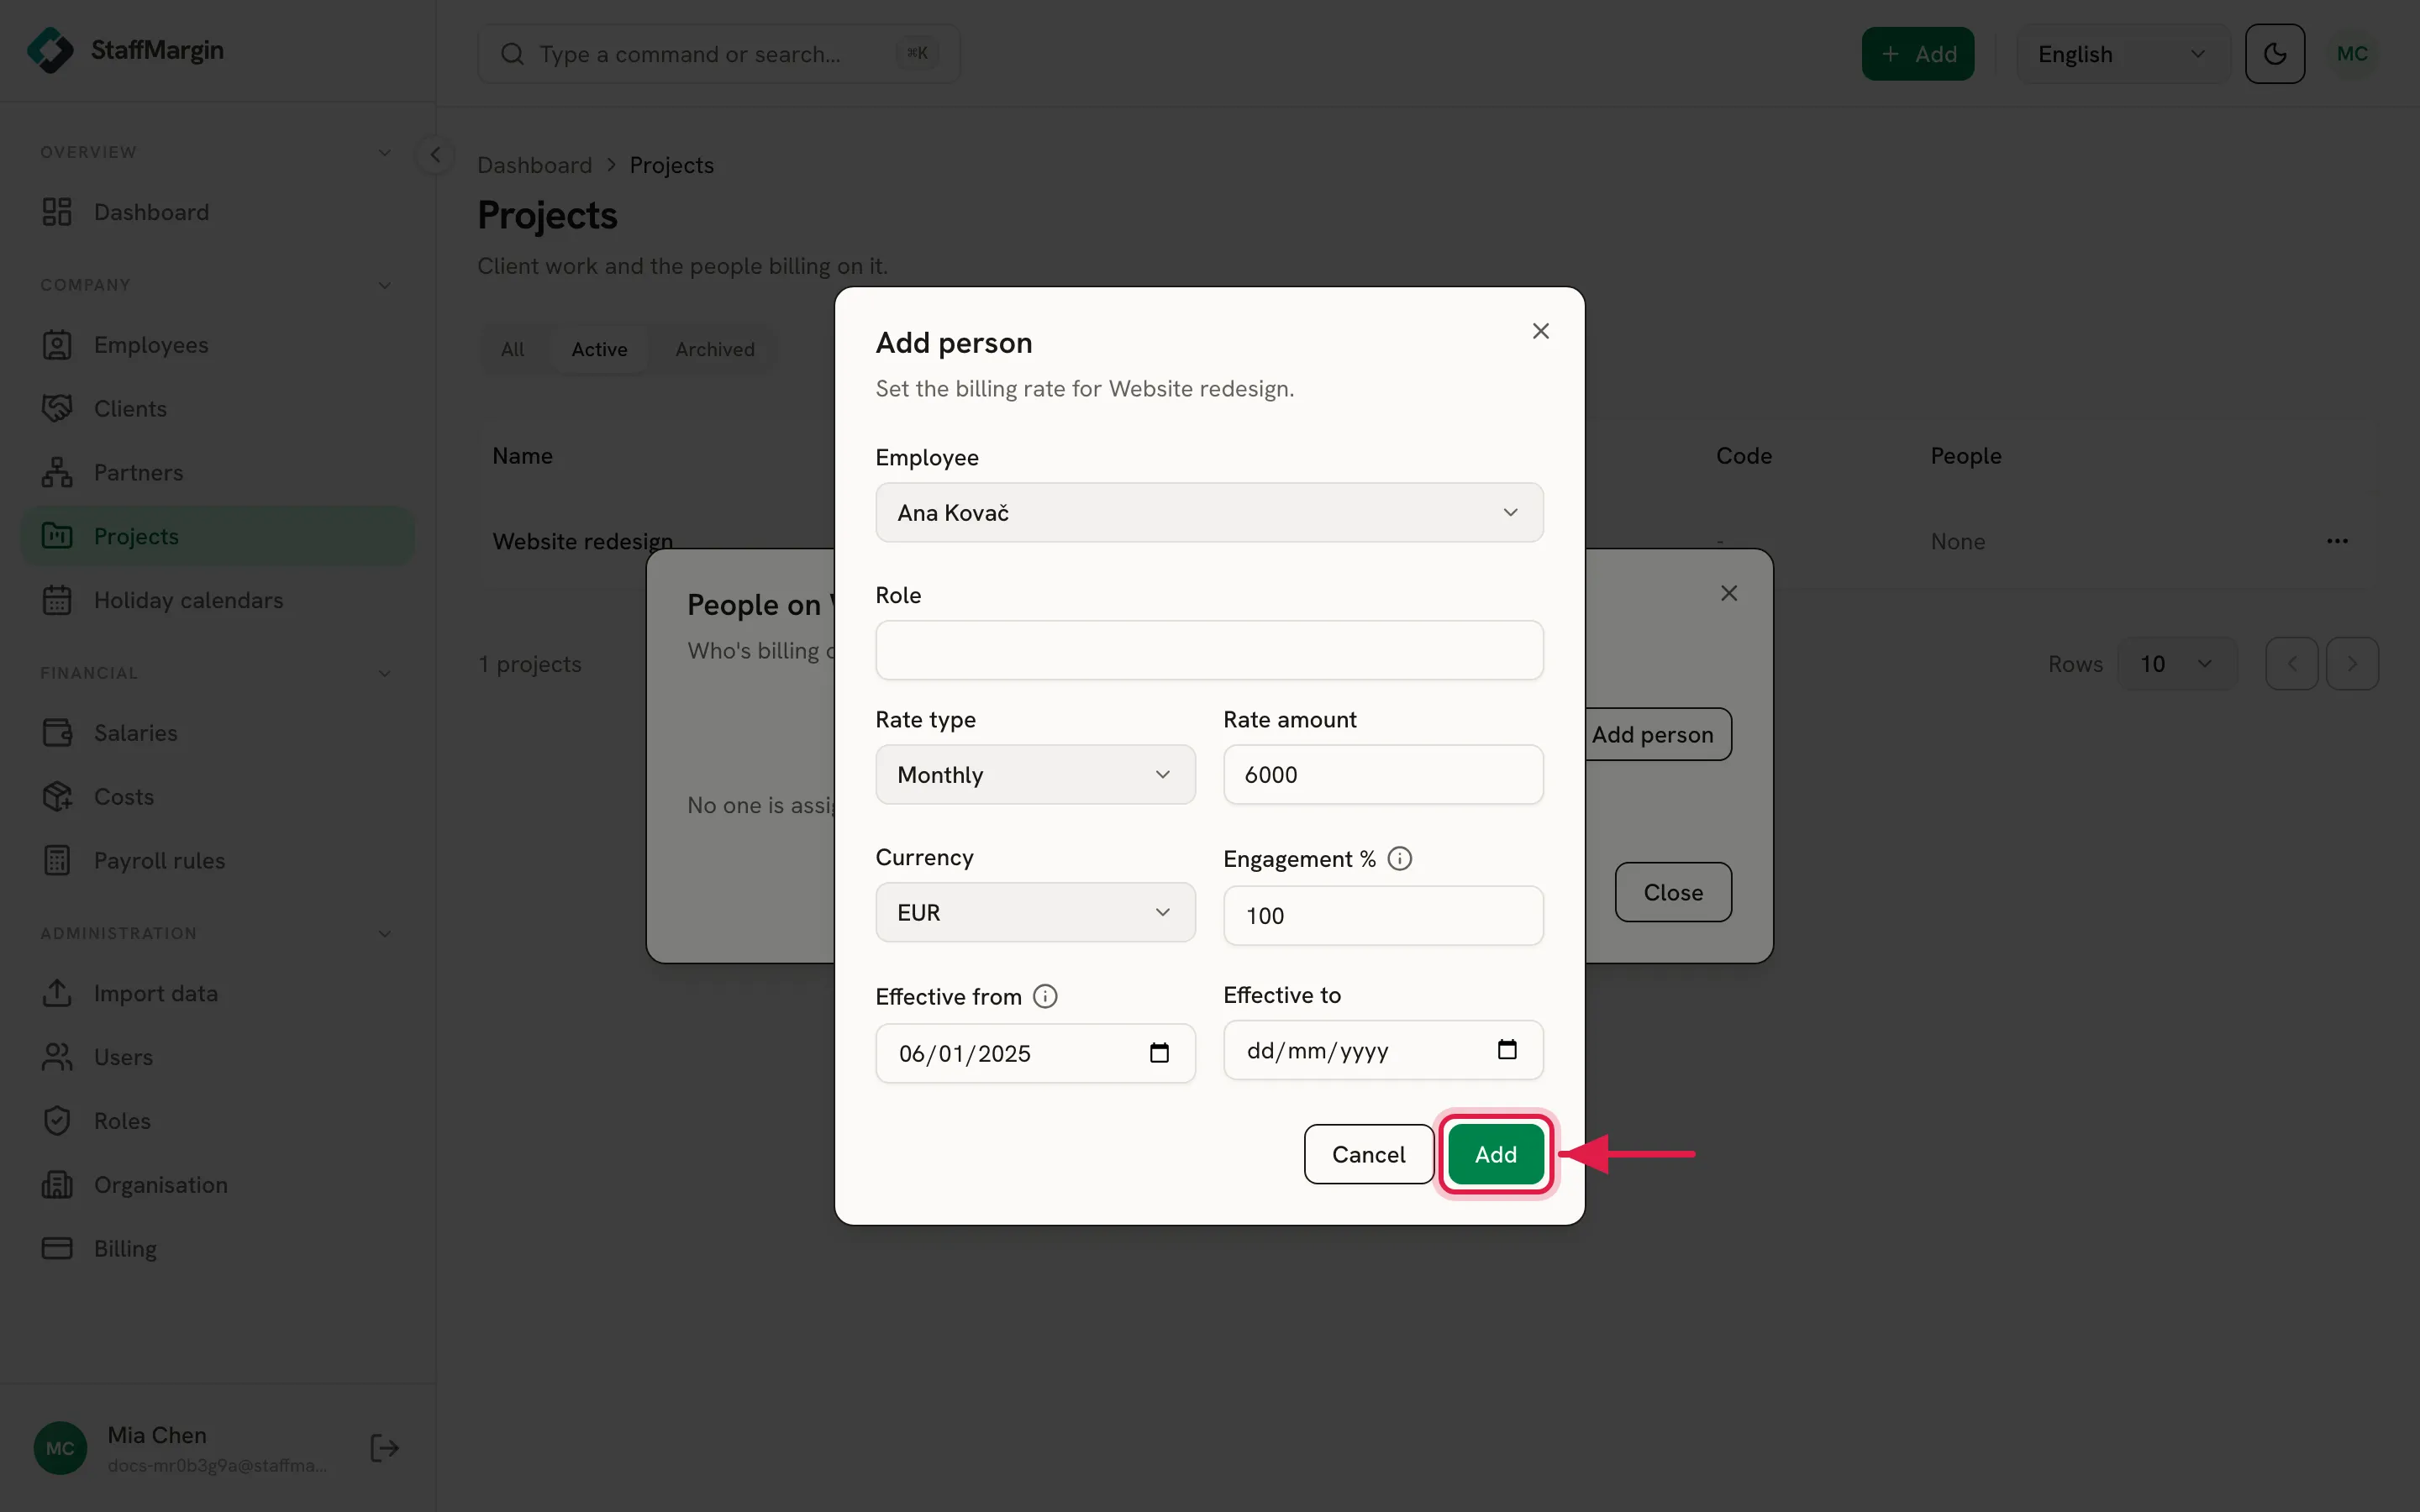
This rate is what you bill the client. StaffMargin compares it against the person’s loaded cost to get the margin. See how margin is calculated.
5.1 Create a cost
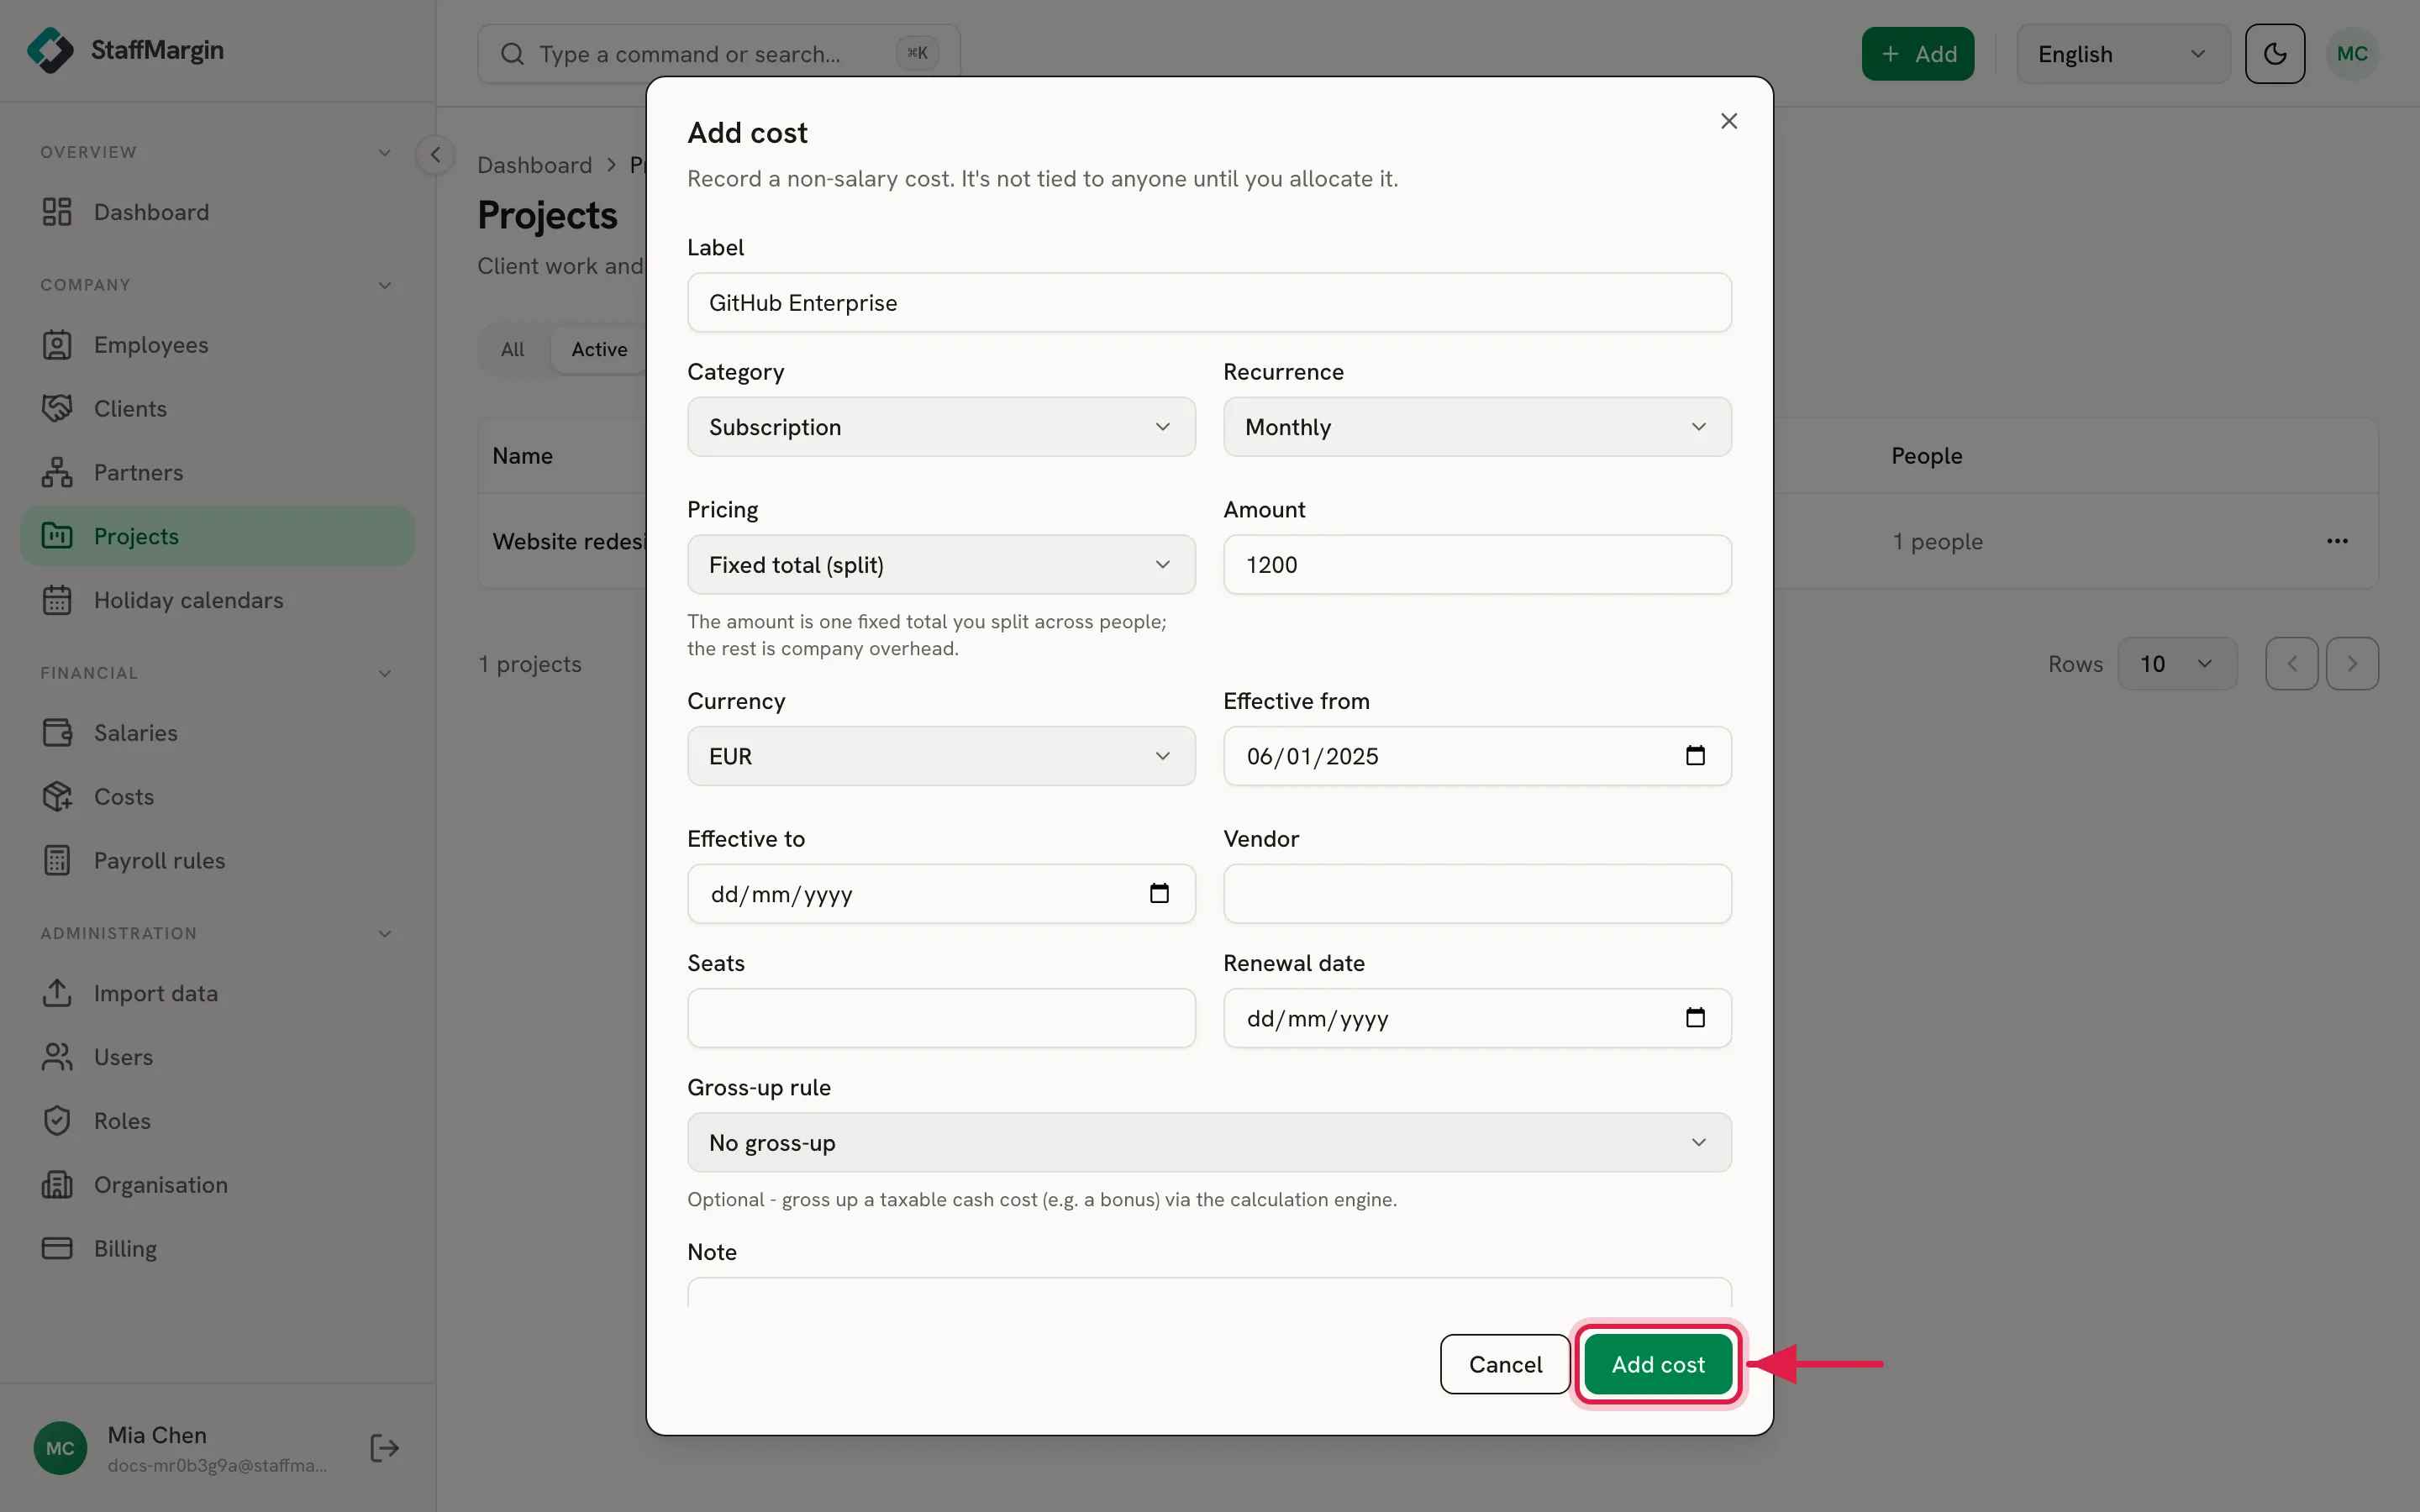
Section titled “5.1 Create a cost”Now add a shared cost, like a software subscription. Click + Add, then Add cost. Give it a label, pick a category and how often it recurs, and enter the amount and currency. Set the date it starts and click Add cost.
5.2 Add the cost to the employee
Section titled “5.2 Add the cost to the employee”Open Costs in the sidebar, find the cost, and open its actions menu, then Manage allocations. Click Add allocation. Pick the employee, choose how to split the cost (set the type to Percentage and a share, for example), set the effective date, and click Add allocation. You can also do this from the employee’s page with Add cost.
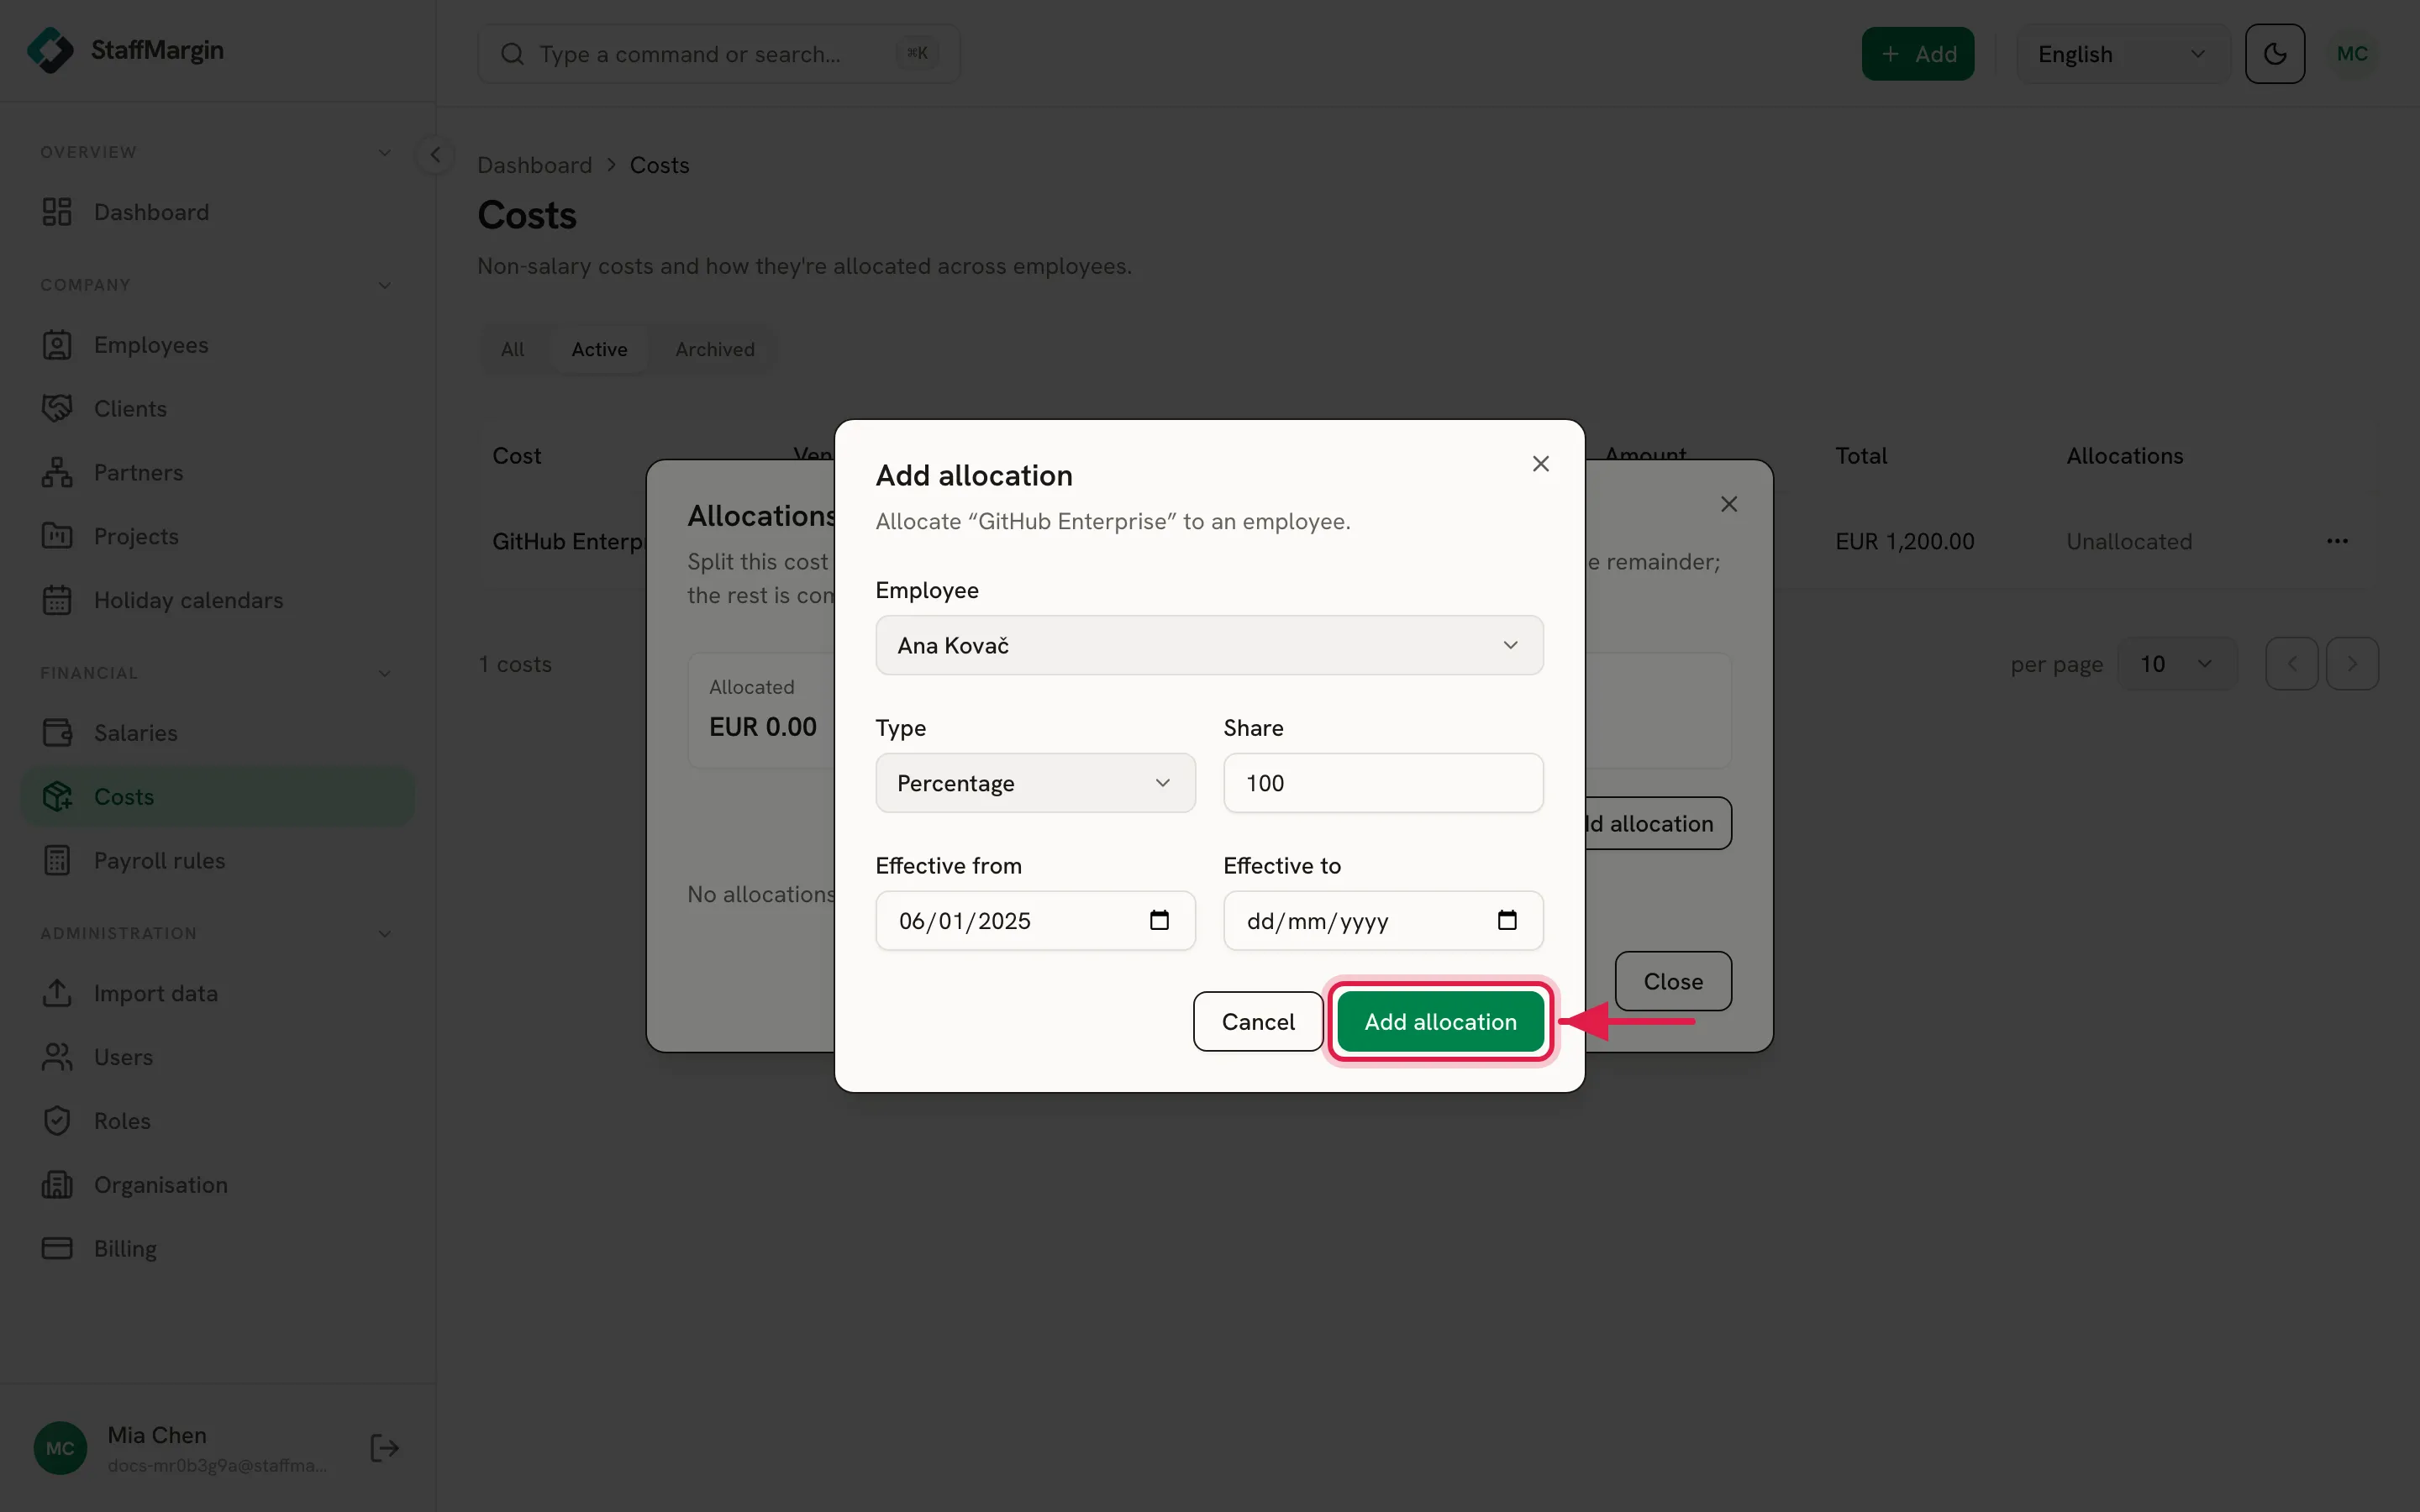
The employee’s share of this cost now rolls into their loaded cost, alongside salary and employer taxes. See costs for the full picture.
6. Check the dashboard
Section titled “6. Check the dashboard”Open Dashboard in the sidebar. Set the reporting currency and a date range at the top. The summary cards show your totals, the chart shows margin per employee, and the switcher below moves between employees, projects, clients, vendors, and salaries. Click any employee row to drill into that person.
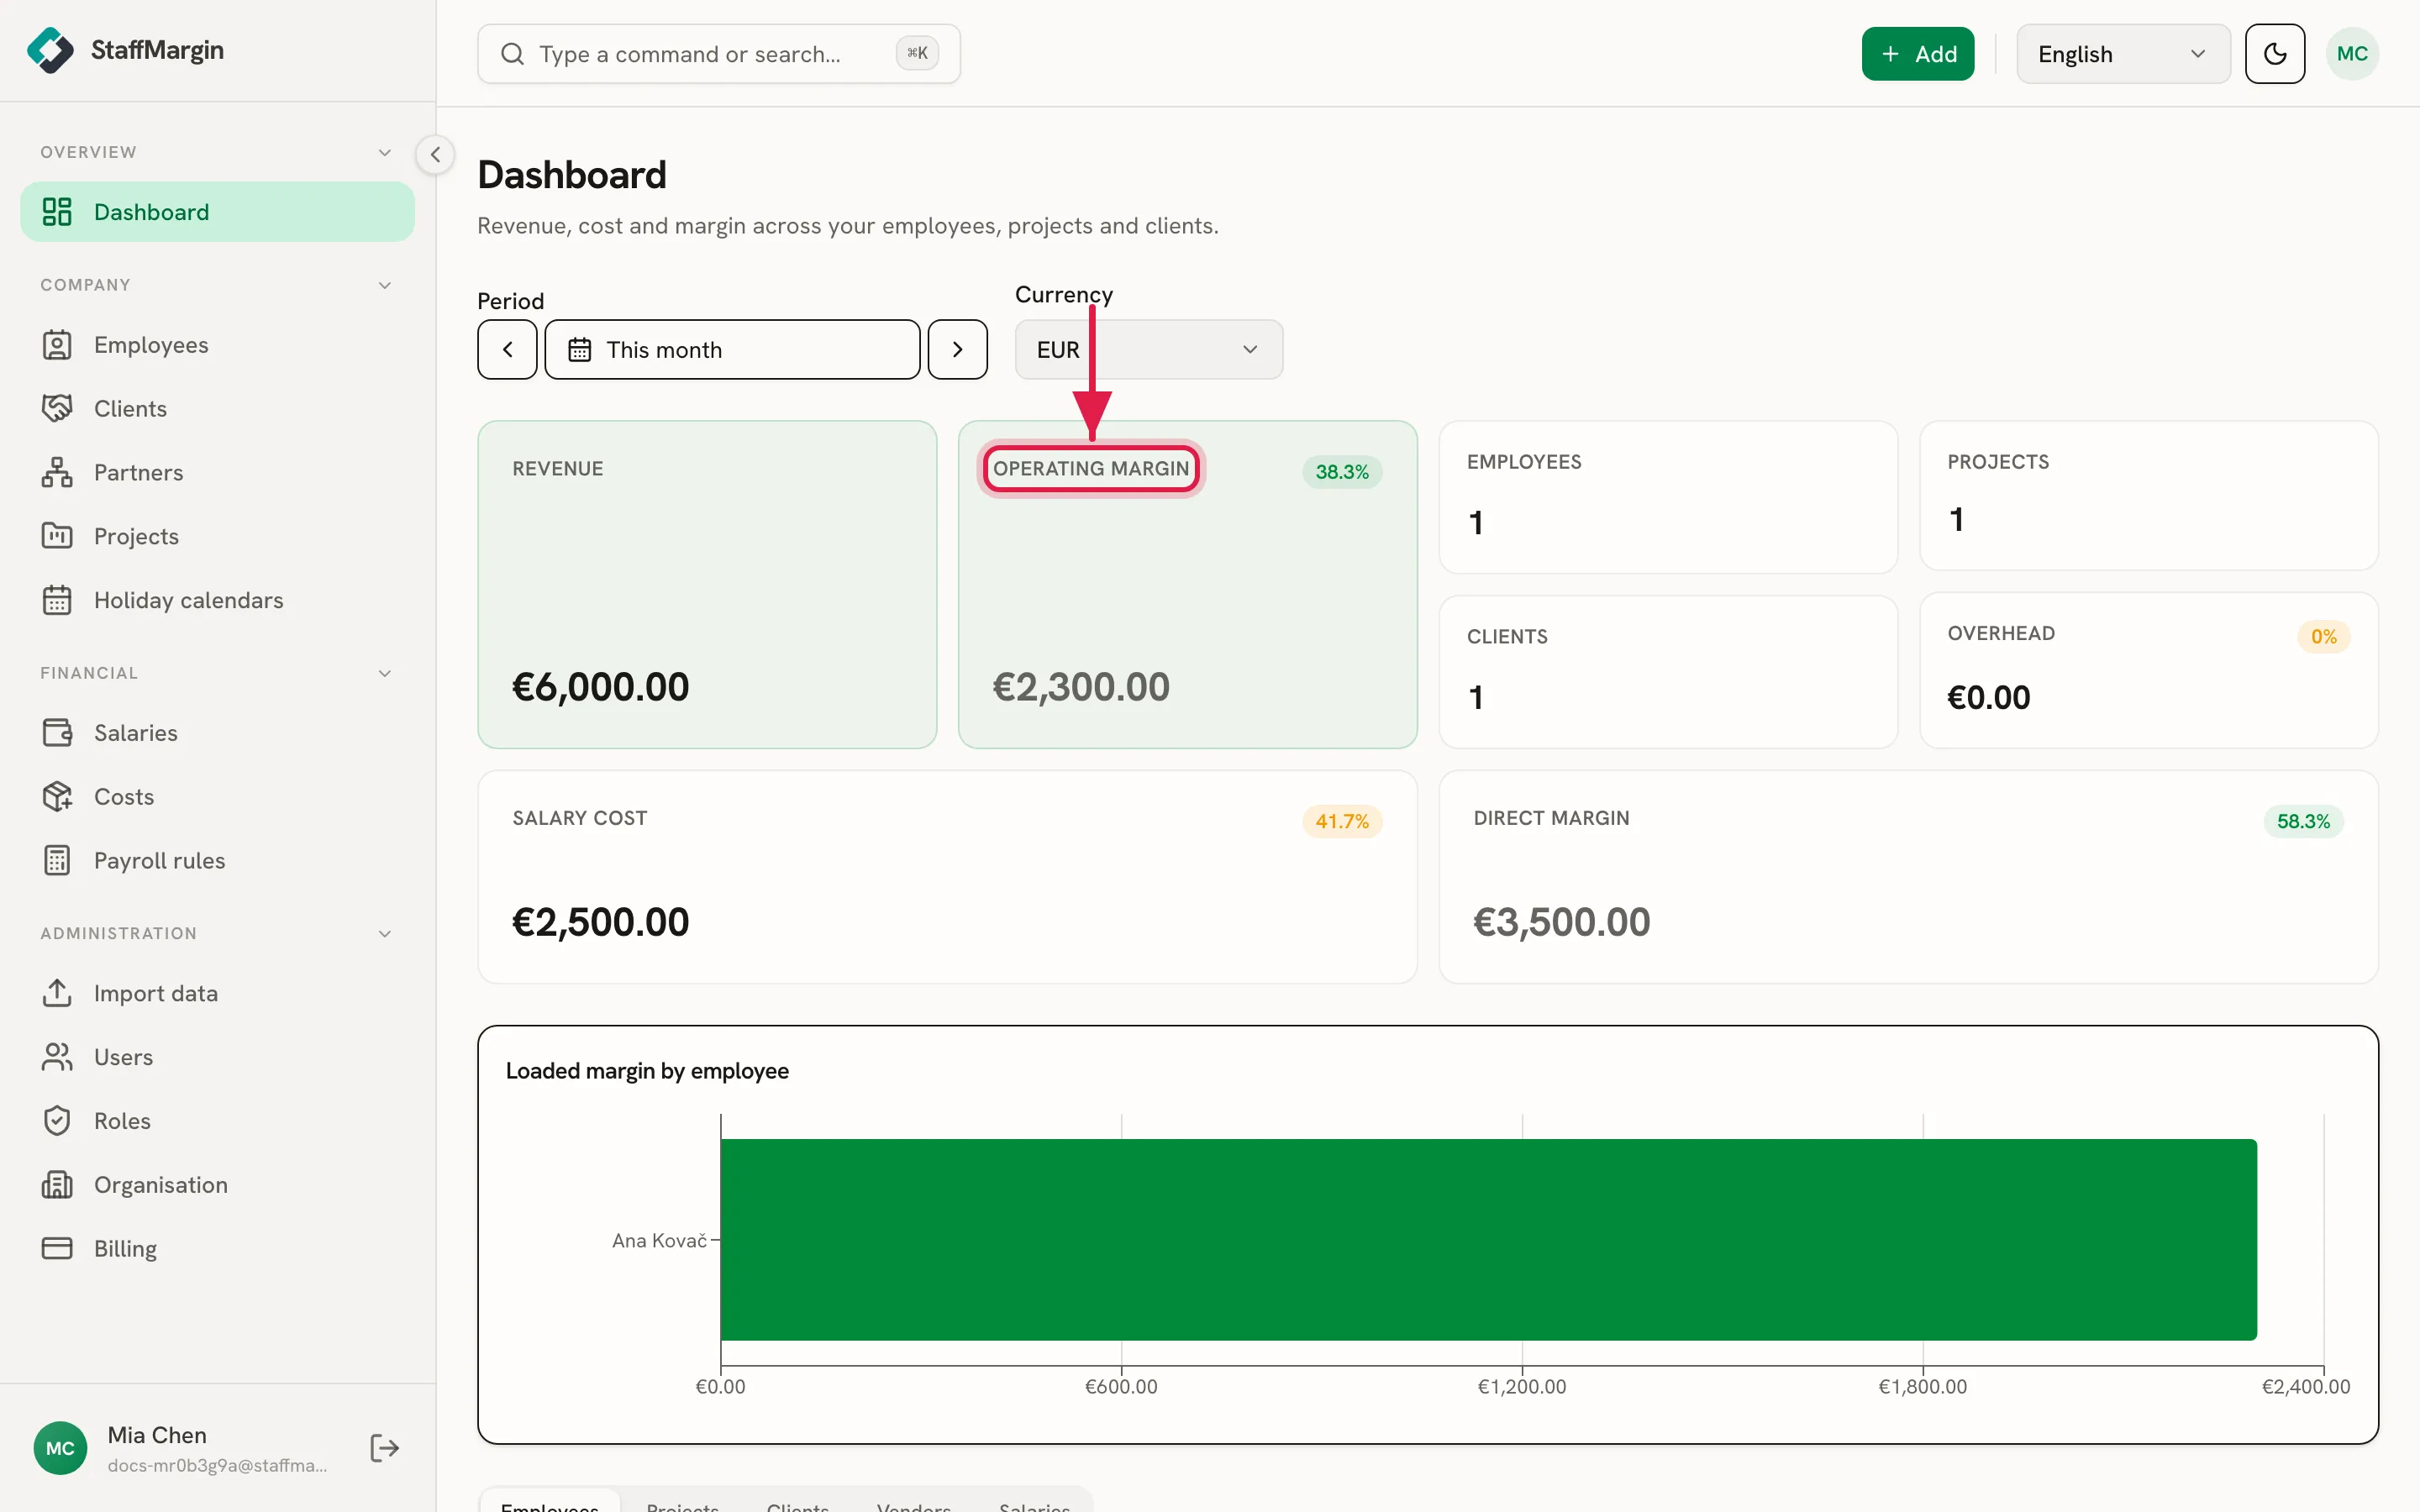
You now have a real margin: billing from the project rate, minus the loaded cost from salary and the allocated cost. That is the whole model, running on one person. Add the rest of your team the same way, or load them in bulk with import.
Related
Section titled “Related”- How margin is calculated
- Employer cost and the salary engine
- A tour of StaffMargin
- Salaries
- Costs
- Import